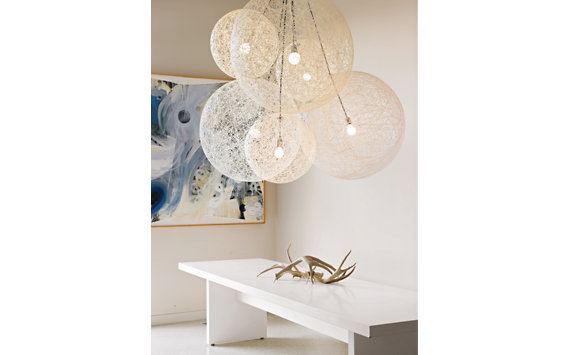
Have you seen these cool string pendant lamps from designer lighting stores? I guess they have been around for a while and it seems like they are here to stay (at least for awhile more). They also seem to go for some hefty prices depending on where you purchase them.
I see there are so many instructions out there on how to make one of these stylish lamps on the internet, but here are some easy instructions I found via Crafty Nest just had to share with you.


Here is how its made:

Supplies and tools
- bouncy balls of various sizes
- clear drying craft glue (about 1 bottle per ball) such as Aleene’s Clear Gel Tacky Glue
- hemp string 20lb. weight
estimated amounts needed:
16 inch diameter ball—400 yards
14 inch diameter ball—300 yards
9 inch diameter ball—100 yards - plastic gloves (optional)
- trash bag or small drop cloth
- permanent marker
- ball inflating needle (available at sporting goods stores or bike shops)
- light fixture and hardware (Lowe’s doesn’t carry the fixture that Heika used anymore. Search online for pendant fitters or pendant light kits.) Try one of these:

1. Draw a circle on the ball with a permanent marker. This circle will mark a space on the lamp that needs to remain clear of string. The empty circle will be used in assembling the light fixture and will allow you to have access for changing light bulbs. If the light fixture you are using has lamp shades, make sure that the circles are big enough for the shades to easily pass through.

2. Cover your work surface with trash bags or a drop cloth, and put on gloves (this gets messy).

3. The best way, I found, to apply the glue is to squeeze a quarter size amount onto your fingers and run the hemp string through the glue and then wrap it around the ball. The string should stick fairly easily to the ball. I tried two other methods that also worked reasonably well, but were much more time consuming and made a bigger mess. You can fill a shallow tub with the glue and run the hemp string through it, or you can apply the glue directly to the string from the bottle.

4. Glue and wrap, glue and wrap, glue and wrap. Just keep going. Try to wrap randomly to avoid criss-cross patterns. The more densely wrapped the lamp is the stronger it will be.

5. Make sure to avoid wrapping string over the circle area. If there are any areas that seem weak, you can apply a little extra glue to give it more strength.

6. Repeat the steps 1-5 to make multiple lamps. Let the glue dry completely. (The glue I recommended takes about 48 hours to cure completely.)

7. Use the inflating needle to deflate the ball.

8. Remove the deflated ball from the lamp.

9. This part takes some basic electrical skills. Follow the installation instructions that come with your light fixture. While installing the light string, feed the wires through the circle hole of the lamp and up through the top, so that the light bulb will hang down in the center of the sphere.
The step-by-step photos are amazing. I've seen these lamps and wondered how difficult they would be to make. Thanks for the tutorial! Great blog, too!
ReplyDeleteWhat a great tutorial...can't wait to try!!
ReplyDelete